Raspberry and Coconut Cake

10259785_10152480902169388_3404315638942538148_n

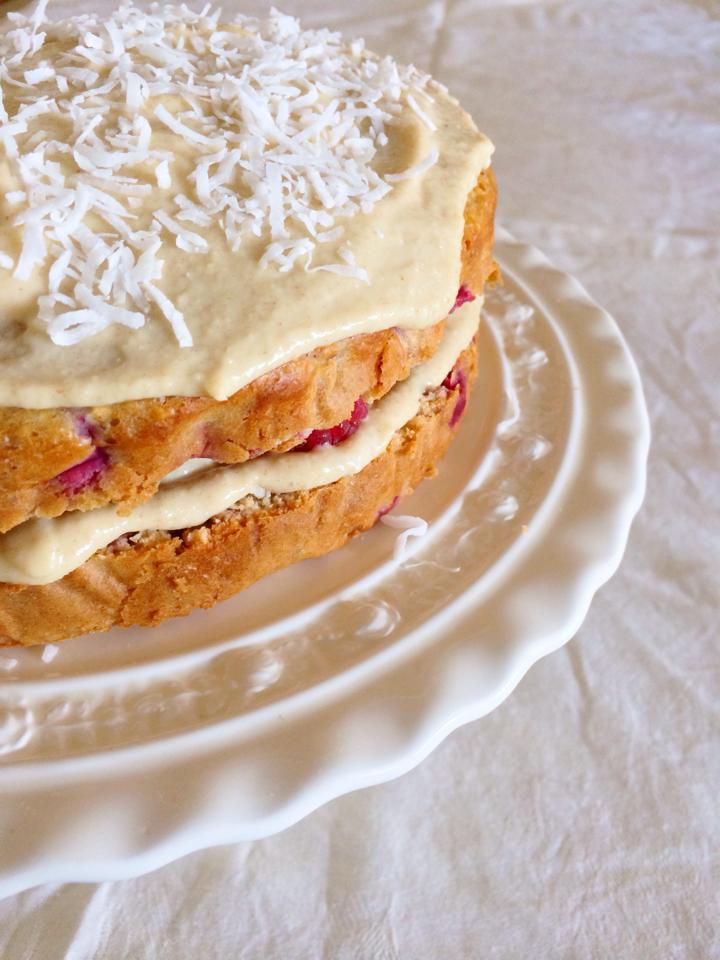
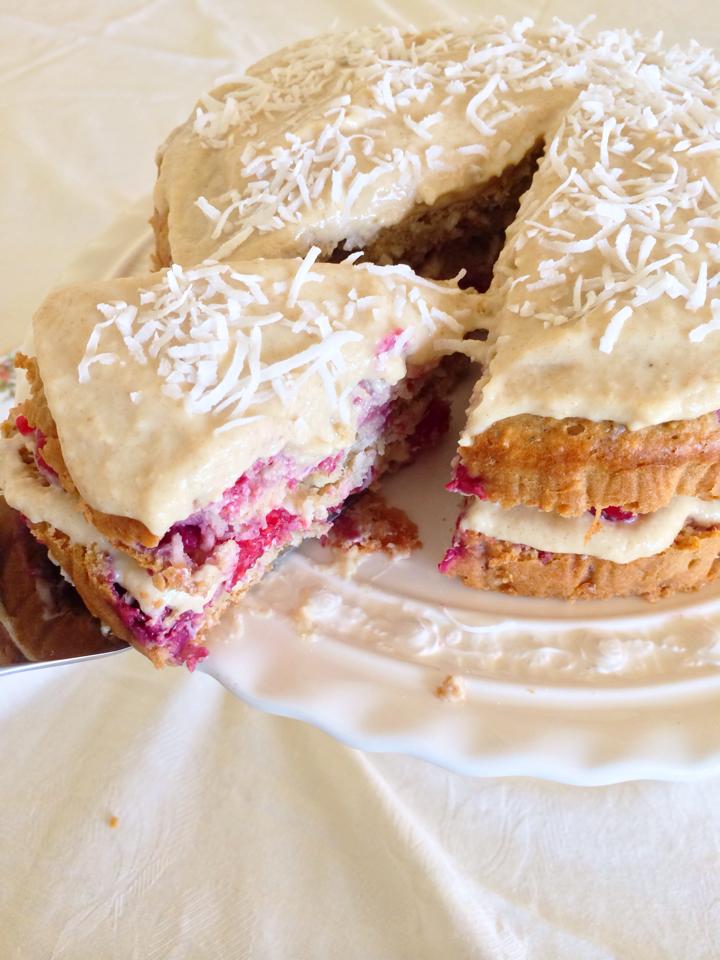
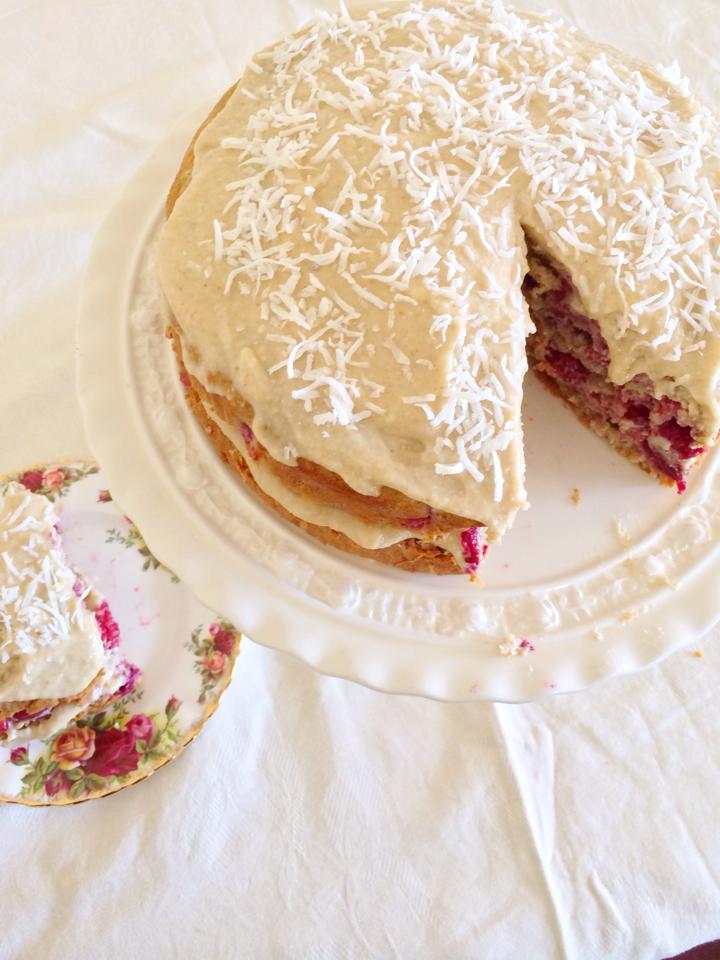
If you’re still deciding what to bake your Mother for Mother’s Day – this recipe is a real treat. A new favourite (I say that about every recipe – I know!) coconut and raspberries have always been a winning combination and this healthy recipe showcases the two together beautifully.

I love baking pretty desserts for a special occasion, however no day is more worthy of this creation than another and it is perfectly acceptable to make this cake on any ordinary afternoon. It is also perfectly acceptable to gobble this creation after dinner, for lunch or morning breaky. Why? Because it’s healthy! No guilt needed when consuming this cake – yay!

10306464_10152480901849388_7477179943275217744_n

10366156_10152480901769388_1694235109319487741_n

INGREDIENTS

Cake:                                                                                           Filling & icing:

½ cup coconut oil                                                                 1 cup cashews

3/4 cup rice malt syrup                                                      2 tbls coconut oil

2 eggs                                                                                          11 dates

6 dates                                                                                        ½ cup rice malt syrup

1 1/2 cups whole wheat flour                                                    1 cup shredded coconut

3 tsp baking powder                                                              ¾ cup water

1 tsp vanilla bean paste                                                       ¼ cup almond milk

1 tsp baking soda

1 cup desiccated coconut

2/3 cup almond milk

150g frozen raspberries

METHOD

For cake:

  • Place oven on 180°C and spray a circular cake tin with baking spray and cover with baking paper.
  • In a mixer or large bowl add melted coconut oil, rice malt syrup and vanilla and mix well.
  • Place all dry ingredients including coconut in mixer and combine well while adding milk and eggs separately.
  • In a small saucepan add dates with around ¼ cup of water and place on low heat while mashing dates with a potato masher or spoon. When water turns into a thick date liquid add to mixture and stir through.
  • Fold through raspberries very slowly with a spatula. If you mix these with the mixer it will crush the raspberries.
  • Place in oven for around 30-40 minutes and then let cool while you prepare the filling.

For filling and icing:

  • In a blender, add all ingredients until a smooth and creamy texture is formed, this may take a few minutes. Feel free to add more water/milk if you prefer a thinner cream.
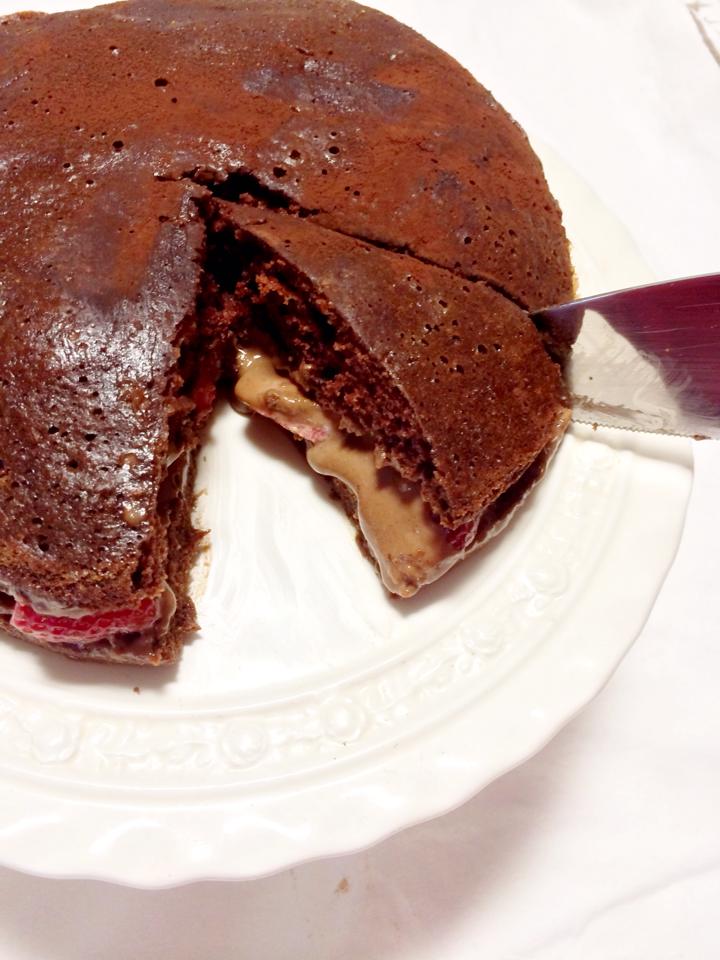
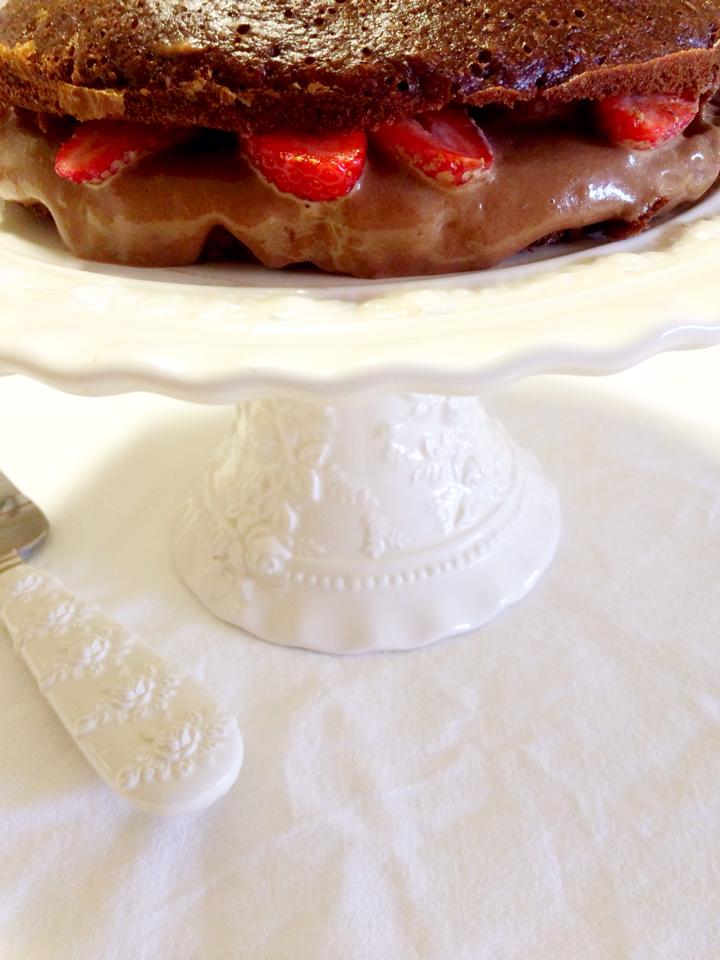
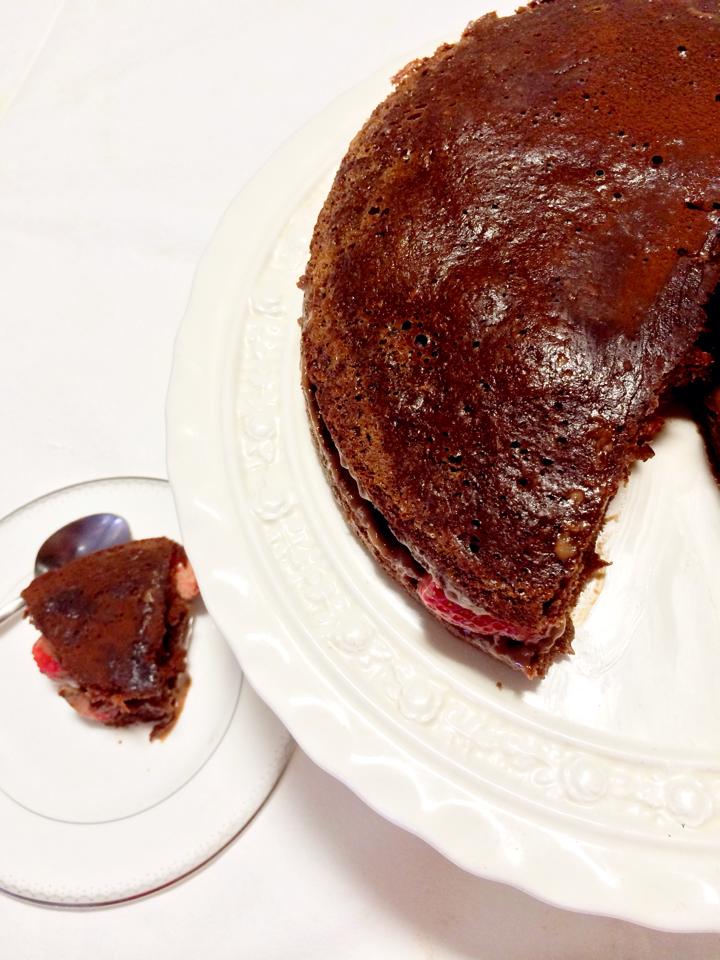
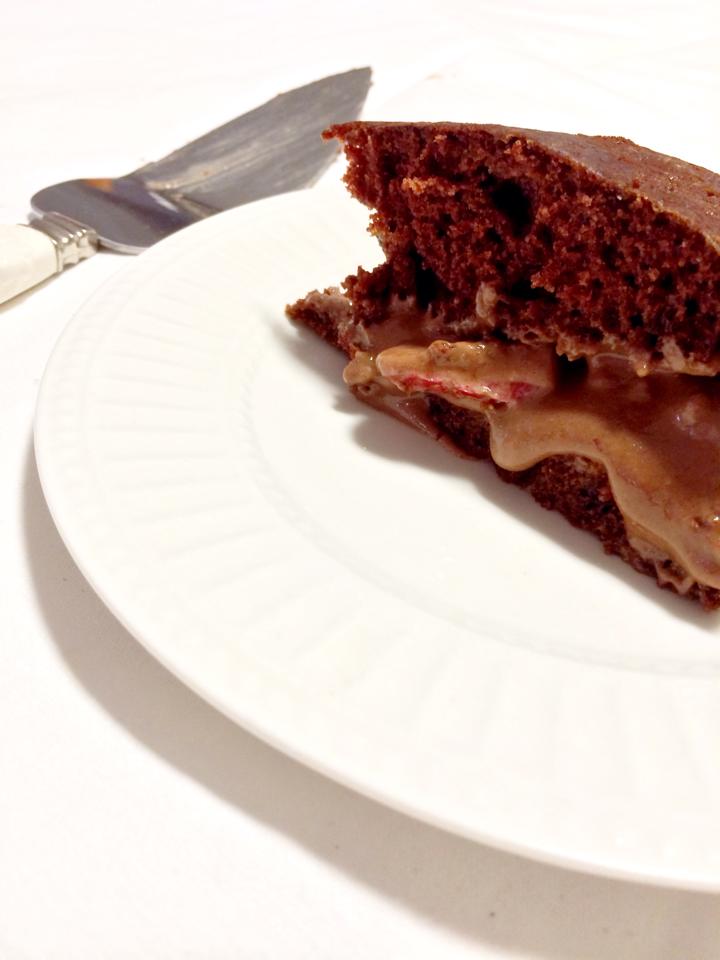
  • Cut the cake in half and smear the filling over the bottom half of the cake. Cover the cream with fresh raspberries and pop the second half on top.
  • With a spatula, cover the top of the cake with cream and sprinkle shredded coconut over for decoration and it is ready to be served – enjoy!

10250222_10152480902079388_1137503698186522085_n


Chewy Chocolate and Peanut Butter Bars

1969406_10152468108499388_6064245576770868457_n

It’s been a while since I have created anything raw and I’m currently a little obsessed with peanut butter. Peanut butter is great and there are so many ways you can include it in your meals or treats. Some even smear it over celery and carrots (I’m yet to try that). And in comparison to natural maple syrups or honey, natural peanut butter is very affordable and accessible from your local grocery store.

You know those days where you grab a bunch of ingredients that are left in the pantry and wiz up something incredible? That is how this yummy recipe was created. I initially wanted to make a peanut butter slice with a nut base; however the peanut butter processed thoroughly with coconut and dates created a wonderful thick texture – perfect for a snack bar. Peanut butter lovers: you will be very happy chaps with this recipe!

PS. This recipe makes around 12 bars!

10249709_10152468108059388_4936734734817669994_n (1)

10250280_10152468108254388_3981895425216446644_n

INGREDIENTS

Peanut Butter Base:                                                  Chocolate Topping:

1 cup walnuts                                                             1/3 cup rice malt syrup

10 pitted dates                                                           ½ cup desiccated coconut

¾ cup desiccated coconut                                    5 dates

1 tbls rice malt syrup                                               1 tsp cacao

1 heaped tbls peanut butter                                  Pinch of salt


METHOD

For peanut butter base:

  • Soak dates in hot water for 2-3 minutes.
  • Process walnuts until fine and then add dates.  Add remaining ingredients and process thoroughly until mixture sticks together.
  • Spray a small baking pan with baking spray and place mixture in evenly using your hands. If mixture is sticky run your hands over hot water and place in the freezer while you prepare chocolate topping.

For chocolate topping:

  • Process coconut and dates until dates are very fine. Add remaining ingredients and process until coconut is not visible in the mixture.
  • Pour over the peanut butter base evenly and pop in the freezer for 2-3 hours. Enjoy!

10247487_10152468108834388_8026857619508760848_n

Caramel and Coconut Cream Cupcakes

1526491_10152459504204388_843265229018425520_n

Behold the clean cupcake recipe!  It truly amazes me how simple it is to create healthy desserts with no sugars or butter. Cupcakes are known to be a true treat and I am extremely excited to share this recipe and encourage you to act on behalf of your sweet tooth and devour!

Usually, when you decide to consume this adorable dessert it’s instilled in your mind that this scrumptious teeny cake contains a large amount of calories, fats and sugars.  And you’re right. Cupcakes are definitely not healthy, however no guilt needed when you make these pretty little cakes. Caramel and coconut is not usually combined in one flavour and I wanted to create something a little unique and different – and the result is truly delicious. These two flavours work brilliantly together in this fluffy cake – try it yourself!

10170967_10152459503274388_7274959599505093206_n

10246340_10152459506564388_4209038333233135027_n

INGREDIENTS

Cupcakes:

1 ½ cups whole wheat flour

½ cup shredded coconut

1 tsp baking soda

1 tsp baking powder

Pinch of salt

11 – 12 pitted dates

1/3 cup almond spread

3 tbls coconut oil

¼ cup almond milk

2 eggs (optional – if you prefer no eggs, add extra almond milk)

½ cup rice malt syrup

¼ cup date water

1 tsp vanilla bean paste


Coconut cream:

½ cup cashews

3 pitted dates

1 cup shredded coconut

1 tbls almond spread

2 tbls rice malt syrup

½ cup almond milk

Extra water


METHOD

For cupcakes:

  • Place oven on 170°C and line 10 paper cases in a cupcake pan.
  • In a mixer or large bowl, sift flour and add all dry ingredients and combine well.
  • Soak dates for 2-3 minutes in hot water and then place dates inside a processor and put aside the water.
  • Process dates with almond spread and melted coconut oil to make the caramel. Add to dry mixture and combine well.
  • Mix through the remaining ingredients well and add extra date water if needed.
  • Scoop 2 tablespoons of mixture into each paper cupcake case and place in the oven for 20-25 minutes. Let cool while you make coconut topping.

For coconut cream:

  • Blend all ingredients together until a cream is formed. Add extra water if needed to make thinner. Also try cream and add extra coconut if you prefer a stronger coconut taste.
  • Scoop one tablespoon of cream on top of each cupcake and smooth over cupcake evenly and enjoy! Mmmm

10276997_10152459503499388_5694268848757035945_n

Chocolate Cake with Cacao Cream and Strawberries

10269386_10152454657239388_1925440857653567011_n


Chocolate cake has a strong effect on even the most controlled individuals; there is just something special about a chocolate sponge with a matching cream. When your spoon digs into the cake’s soft texture and the sauce drizzles out from the centre, you know you have entered dangerous territory and the button on your jeans will most likely be required to be undone.

A friend of mine recommended I create a clean chocolate cake and the pretty presentation and taste of this delectable dessert is definitely one to serve when entertaining guests. The combination of the chocolate sponge with cacao cream and fresh strawberries is simply lovely and not overly rich (as some chocolate cakes tend to be) oh and did I mention it is healthy? Unbelievable!

10154556_10152454657679388_7408918252167273804_n

10155592_10152454657439388_2941440989010486752_n

INGREDIENTS

Chocolate Cake:

1 ½ cups whole wheat flour

¼ cup cacao

1 tsp baking powder

1 tsp baking soda

½ tsp cinnamon

3 tbls coconut oil

½ cup rice malt syrup

6 dates

¼ cup water

¼ cup almond milk

Pinch sea salt


Filling:

1 cup cashews

10 – 12 dates

3 tbls rice malt syrup

2 tbls coconut oil

1 ½ tbls cacao

½ cup water

¼ cup almond milk

Half a punnet of fresh strawberries

Handful of dark chocolate chips (optional)


METHOD

For cake:

  • Place oven on 170°C and spray a circular cake tin with baking spray.
  • In a mixer or large bowl, sift flour and add all dry ingredients and combine well.
  • Place dates and water in a small pot on low heat and crush until a thin liquid and add to mixture.
  • Add the remaining wet ingredients except eggs and mix while cracking one egg at a time into the mixture.  If cake mixture is a little thick add some extra water or almond milk.
  • Pour cake mix into the cake tin and place in the oven for 25 minutes. Let cool while you prepare the chocolate cream.

For filling:

  • Cut strawberries in halves and put aside.
  • Place dates, water, coconut oil, rice malt syrup and cacao in a small pot on low heat and crush dates until a chocolate sauce is formed.
  • In a blender, add cashews, almond milk, chocolate sauce and chocolate chips and blend well to make a chocolate cream. Add extra water if cashews are not completely blended or if you prefer a creamier look.
  • Cut the chocolate cake in half and smear the filling over the bottom half of the cake. Cover the cream with strawberries and pop the second half on top.  The cream may drizzle down the sides (this only makes it look even more delicious). Sift some cacao over the top of the cake and serve! Mmmm

10299951_10152454657114388_2065831324775834073_n


Anzac Day Biscuits

1981969_10152439221584388_6048117743575793455_n

Mmm Anzac Day biscuits – crunchy on the outside and chewy on the inside.  My Mother makes Anzac Day biscuits on a regular basis and I have been reminding myself to attempt a healthy recipe for a while. Since Anzac Day is coming up I figured it would be the perfect opportunity. And the result? Success! I adapted the recipe from I Quit Sugar and am very pleased with the result.

You would never know these are a ‘clean’ Anzac Day biscuit as the taste and texture is just as perfect as one filled with butter and sugars. They also leave a beautiful scent in your kitchen whilst baking in the oven.  Grab one with your cup of tea and enjoy!

10154060_10152439221174388_1168097424266754189_n

10262063_10152439221419388_9110582148300517782_n

INGREDIENTS

½ cup coconut oil or coconut butter

1/2 cup rice malt syrup

Pinch of salt

1 ½ tsp baking soda

4 tbls boiling water

1 cup rolled oats

¾ cups desiccated coconut

3/4 cup whole wheat or wholemeal flour

2 tsp baking powder

½ cup macadamias (optional)

Drizzle of organic dark chocolate (optional)

METHOD

  • Preheat oven to 150°C and spray baking trays with baking spray.
  • Pop a small pot on low heat and place rice malt syrup and coconut oil inside until both have melted into a liquid and add a pinch of salt.
  • Combine baking soda with boiling water and add to the pot and stir through – the mixture will start to bubble.
  • In a large bowl, place remaining ingredients inside and mix well.
  • Pour the liquid mixture into the large bowl with dry ingredients and combine well.
  • Roll 1 teaspoon of mixture into a ball and place on tray and flatten lightly.
  • Place baking tray in oven for 20 minutes and let cool. Serve with a warm cuppa and enjoy!

10154965_10152439220989388_845501505350428078_n

Chocolate Peppermint Ice-Cream Cookie Sandwiches

10169452_10152434899114388_2336931876705517064_n

Oh Melbourne, glorious sun one day and thrashing winds the next. You never know what weather to expect in this lovely city I reside in, however whatever the temperature I can be sure of one thing: it is never EVER too cold for ice cream. Hence my latest creation made with a fresh peppermint twist.

Last July in Santa Monica my brother and I stumbled across an amazing food truck festival on Main St. After devouring a true American burger (as you do when in LA) I ordered a mint chocolate ice cream sandwich and was blown away! The peppermint ice cream melted in my mouth against the warm chewy chocolate cookie. For months I have been reminiscing about the glorious treat from Main St and am proud to have recreated a healthier guilt-free chocolate mint sandwich. And it is super delicious!

PS. Be sure to freeze bananas for at least 5-6 hours prior to baking.

10304785_10152434899324388_2571065277657484019_n

1926931_10152434899034388_7466295367390176522_n

INGREDIENTS

Chocolate Peppermint Cookies:

2 cups whole-wheat or wholemeal flour

½ cup coconut oil

3/4 cup rice malt syrup

¼ cup almond milk

1 tsp vanilla extract

1 tsp baking powder

1 tsp baking soda

½ tsp salt

1 tsp peppermint extract

1 tbls cacao

*You may also add cacao nibs or dark chocolate chips to mixture if you wish

Chocolate Peppermint Ice Cream:

2 frozen bananas

1 tsp peppermint oil

2 tbls almond milk

1 drop of green food colouring

A small handful of dark chocolate chips or cacao nibs

For cookies:

  • Preheat oven to 190°C and line baking tray.
  • In a mixer or large bowl, combine coconut oil and rice malt syrup, and then add almond milk and vanilla.
  • In a separate large bowl mix flour, cacao, baking powder, baking soda and salt together lightly and pour into mixer with peppermint oil and mix well.
  • Using your fingers, roll and flatten mixture into medium sized circles and place onto baking tray.
  • Bake for 13 minutes and let cool while you prepare ice cream.


For ice cream:

  • Blend bananas with all ingredients until a creamy ice cream texture. If it is a little runny pop back in freezer for an hour or two.
  • Place one cookie with flat side facing up on a plate and smear ice cream evenly on the cookie.
  • Grab another cookie and pop over the ice cream cookie and you have yourself a sandwich! Mmmm

10250160_10152434899559388_8550957949750111006_n

Crunchy Peanut Butter and Chocolate Chip Cookies

1609775_10152422020409388_7169897974718161815_n

OK, I need these in my life every single day. These crunchy chocolate chip and peanut butter cookies are exquisitely AMAZING. I never imagined to see a day that a healthy cookie recipe would live up to my Mother’s, but the time has miraculously arrived and I am not complaining! The dark chocolate chips generously distributed throughout the peanut butter biscuit leaves an indulgent surprise – especially when munching on them straight out of the oven (if you’re like me, you may burn your fingers – be patient!)

My cookies are proof that you can substitute the ingredients in sugary dessert recipes for a healthy version that tastes just as delightful! Let me give you a couple examples:

1 cup of butter = ½ cup coconut oil

1 cup of brown sugar = ½ cup rice malt syrup

Simple substitutions make it easy to recreate your favourite recipes into a guilt-free treat that you won’t regret. So go on, grab another cookie… you know you want to.

1506799_10152422020349388_229161320925420339_n

1526156_10152422019729388_6314157667069321463_n

INGREDIENTS

2 cups whole-wheat or wholemeal flour

½ cup coconut oil

½ cup rice malt syrup

¼ cup almond milk

2 ½ tbls natural peanut butter

1 tsp vanilla extract

1 tsp baking powder

1 tsp baking soda

½ tsp salt

1 cup dark chocolate chips or vegan chocolate chips


METHOD

  • Preheat oven to 190°C and line baking tray.
  • In a mixer or large bowl, combine coconut oil and rice malt syrup, and then add almond milk and vanilla.
  • In a separate large bowl mix flour, baking powder, baking soda and salt together lightly and pour into mixer with peanut butter.
  • Mix thoroughly to a cookie-dough and fold through chocolate chips slowly.
  • Using your fingers, roll mixture into small balls and place onto baking tray while pressing lightly on each cookie with a fork.
  • Bake for 10 minutes and let cool! Enjoy!

10009789_10152422019994388_3505246075129340747_n

Apple and Hazelnut Muffins

1922049_10152417637859388_8849444238093697604_n

I must give credit where credit is due…. My lovely mother helped me create these scrumptious muffins following my first disastrous muffin attempt (think oat porridge with raspberry mush).  My mum is a FANTASTIC cook and has been learning about combining healthy ingredients (through me of course hehe) to develop delicious creations. Sometimes, mothers know best – especially when it comes to cooking!

These muffins are so close to perfection that even my father who refuses to try any sugar-less desserts – is munching on one right now with his tea! Apple and hazelnut may not be the usual muffin option at your local café, but my goodness these two unique ingredients blend together beautifully. Enjoy!

10259753_10152417636229388_41216140807099047_n

10168161_10152417637439388_5396533679834340038_n


INGREDIENTS

3 small cube apples

4 tbls water

2 tbls Marsala wine

2 tbls rice malt syrup

Handful of sultanas

Cinnamon (as much or as little as you like)

2 eggs

1 ½ cup hazelnut meal

1 ½ tsp baking powder

1 tsp vanilla

METHOD:

  • Place oven on 180°C and spray cupcake pan with baking spray.
  • Thinly slice apples and place in a small pot. Add Marsala, rice malt syrup, sultanas, cinnamon and water to pot and let simmer for 20 minutes.
  • In a large bowl or mixer, add hazelnut meal and baking powder.
  • Beat 2 eggs and place in mixture with vanilla and combine well.
  • Once the apples are ready, add to mixture and mix together thoroughly.
  • Fill up each muffin case ¾ full and sprinkle some hazelnut meal over each one for decoration. Place in oven for 25 minutes and enjoy! These are great warm or cooled!

1979579_10152417673324388_4073171905015605228_n (1)

Mini Chocolate Easter Eggs

10257804_10152408185754388_623063764950746966_n

Since I was a child, my memories of Easter have always involved devouring one main sweet that is placed inside the small triangle at the tip of the food pyramid and labelled as ‘Eat Sparingly.’ If you haven’t guessed what that is yet, I am talking about CHOCOLATE! Yes, that smooth, succulent, sensual sweet you would find on Easter egg hunts as a child, and the junk food you turn to when you need an emotional pick-me-up.

Each year during Easter I am given around 1832894 chocolaty eggs as presents (and I’m not complaining) from friends and family. Although I am very grateful for these foil wrapped balls of heaven, I am NOT grateful for the rolls of fat I feel rapidly forming around my body after I splurge on an ‘Easter-Egg-Frenzy’ and consume so much chocolate that even the smell leaves me feeling ill (a very rare thing for me to say). And that is why I have created your very own mini CLEAN Easter eggs! Smooth, succulent, sensual AND healthy! These may be demolished as fast as your heart desires.

1512857_10152408188594388_2539175052078865238_n

10258768_10152408186014388_1653909990572368991_n (1)


INGREDIENTS

½ cup coconut oil

½ cup rice malt syrup

2 tbls cocao

4-5 dates

METHOD

  • Blend all ingredients until a creamy chocolate liquid. Make sure all dates are completely blended and there are no chunky bits.
  • Pour over Easter egg moulds and pop in the freezer for around 6-8 hours until set and devour!

10173641_10152408185914388_3798693600243576375_n

Guilt-free Banana Bread

10156044_10152402267729388_540022015_n

As the cool Melbourne breeze sweeps the city, the desserts are becoming warmer and warmer… Ahh the joyous feeling when you curl up on the couch watching bad TV (Kardashians anyone?) with a cosy blanket, a cup of tea and a small sweet. It was 25 degrees in Melbourne today so I may be getting ahead of myself, but I’m sure the chilly nights will be occurring soon enough! And I am definitely well prepared with this delectable banana bread recipe. Toasted or fresh, the banana bread is subtly sweet with a light and fluffy texture – PERFECT with your tea or coffee in the morning, or after a hearty dinner. Trust me, I was picking at the loaf before it had a chance to cool down, and the recipe is super easy – tick!

10150776_10152402267499388_703314028_n

970172_10152402267584388_223085090_n

INGREDIENTS

1 cup rolled oats

1 ¼ cup almond milk

1 cup desiccated coconut

2 eggs (optional)

2 bananas mashed

7-8 dates

½ cup rice malt syrup

4 tbls chia seeds

1 tsp vanilla bean paste

¼ cup water

walnuts (optional)


METHOD

  • Preheat oven to 170°C and line a rectangular baking pan with baking paper.
  • Process oats, coconut and chia seeds to a powdery texture to make oat/coconut flour.
  • In a mixer (or large bowl) mix the flour through while adding almond milk and eggs in alternating batches.
  • Place dates in a pot with about ¼ cup of water on medium heat and mash dates to form a thick liquid.
  • Add mashed dates, mashed bananas, rice malt syrup and vanilla to mixture and combine well. If mixture is too thick feel free to add a tablespoon or two of almond milk or water.
  • Pour mixture into baking pan and place in oven for around 35 – 40 minutes.
  • Let cool and either toast or serve fresh with a warm drink and enjoy!

1503836_10152402267654388_1473008024_n