Banana & Chocolate Cake

11215147_10153820076209388_4195784030942901808_n


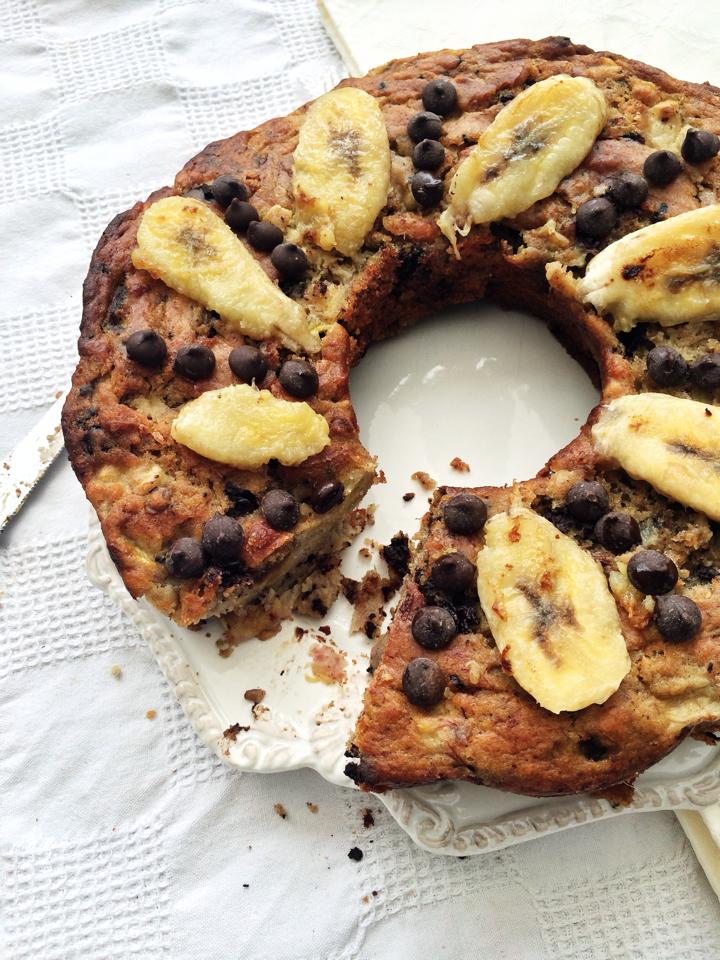
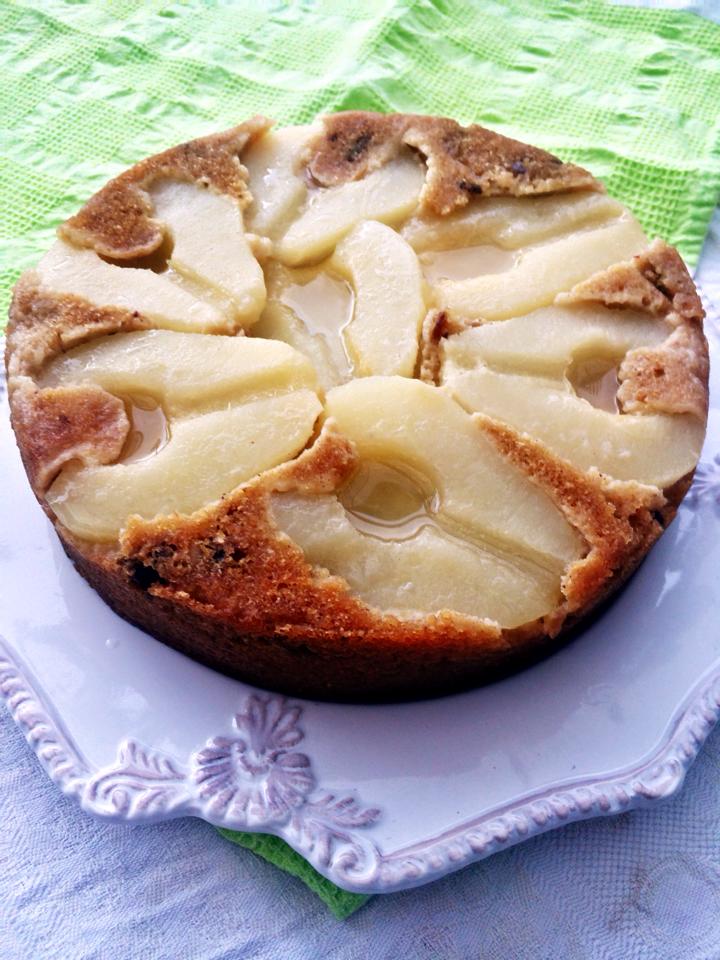
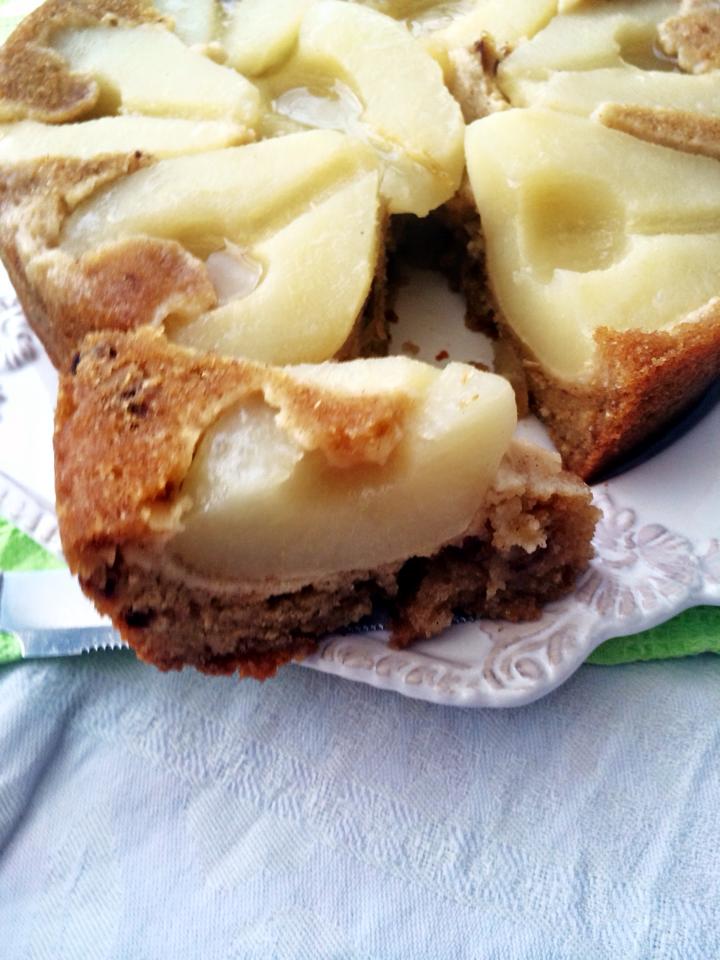
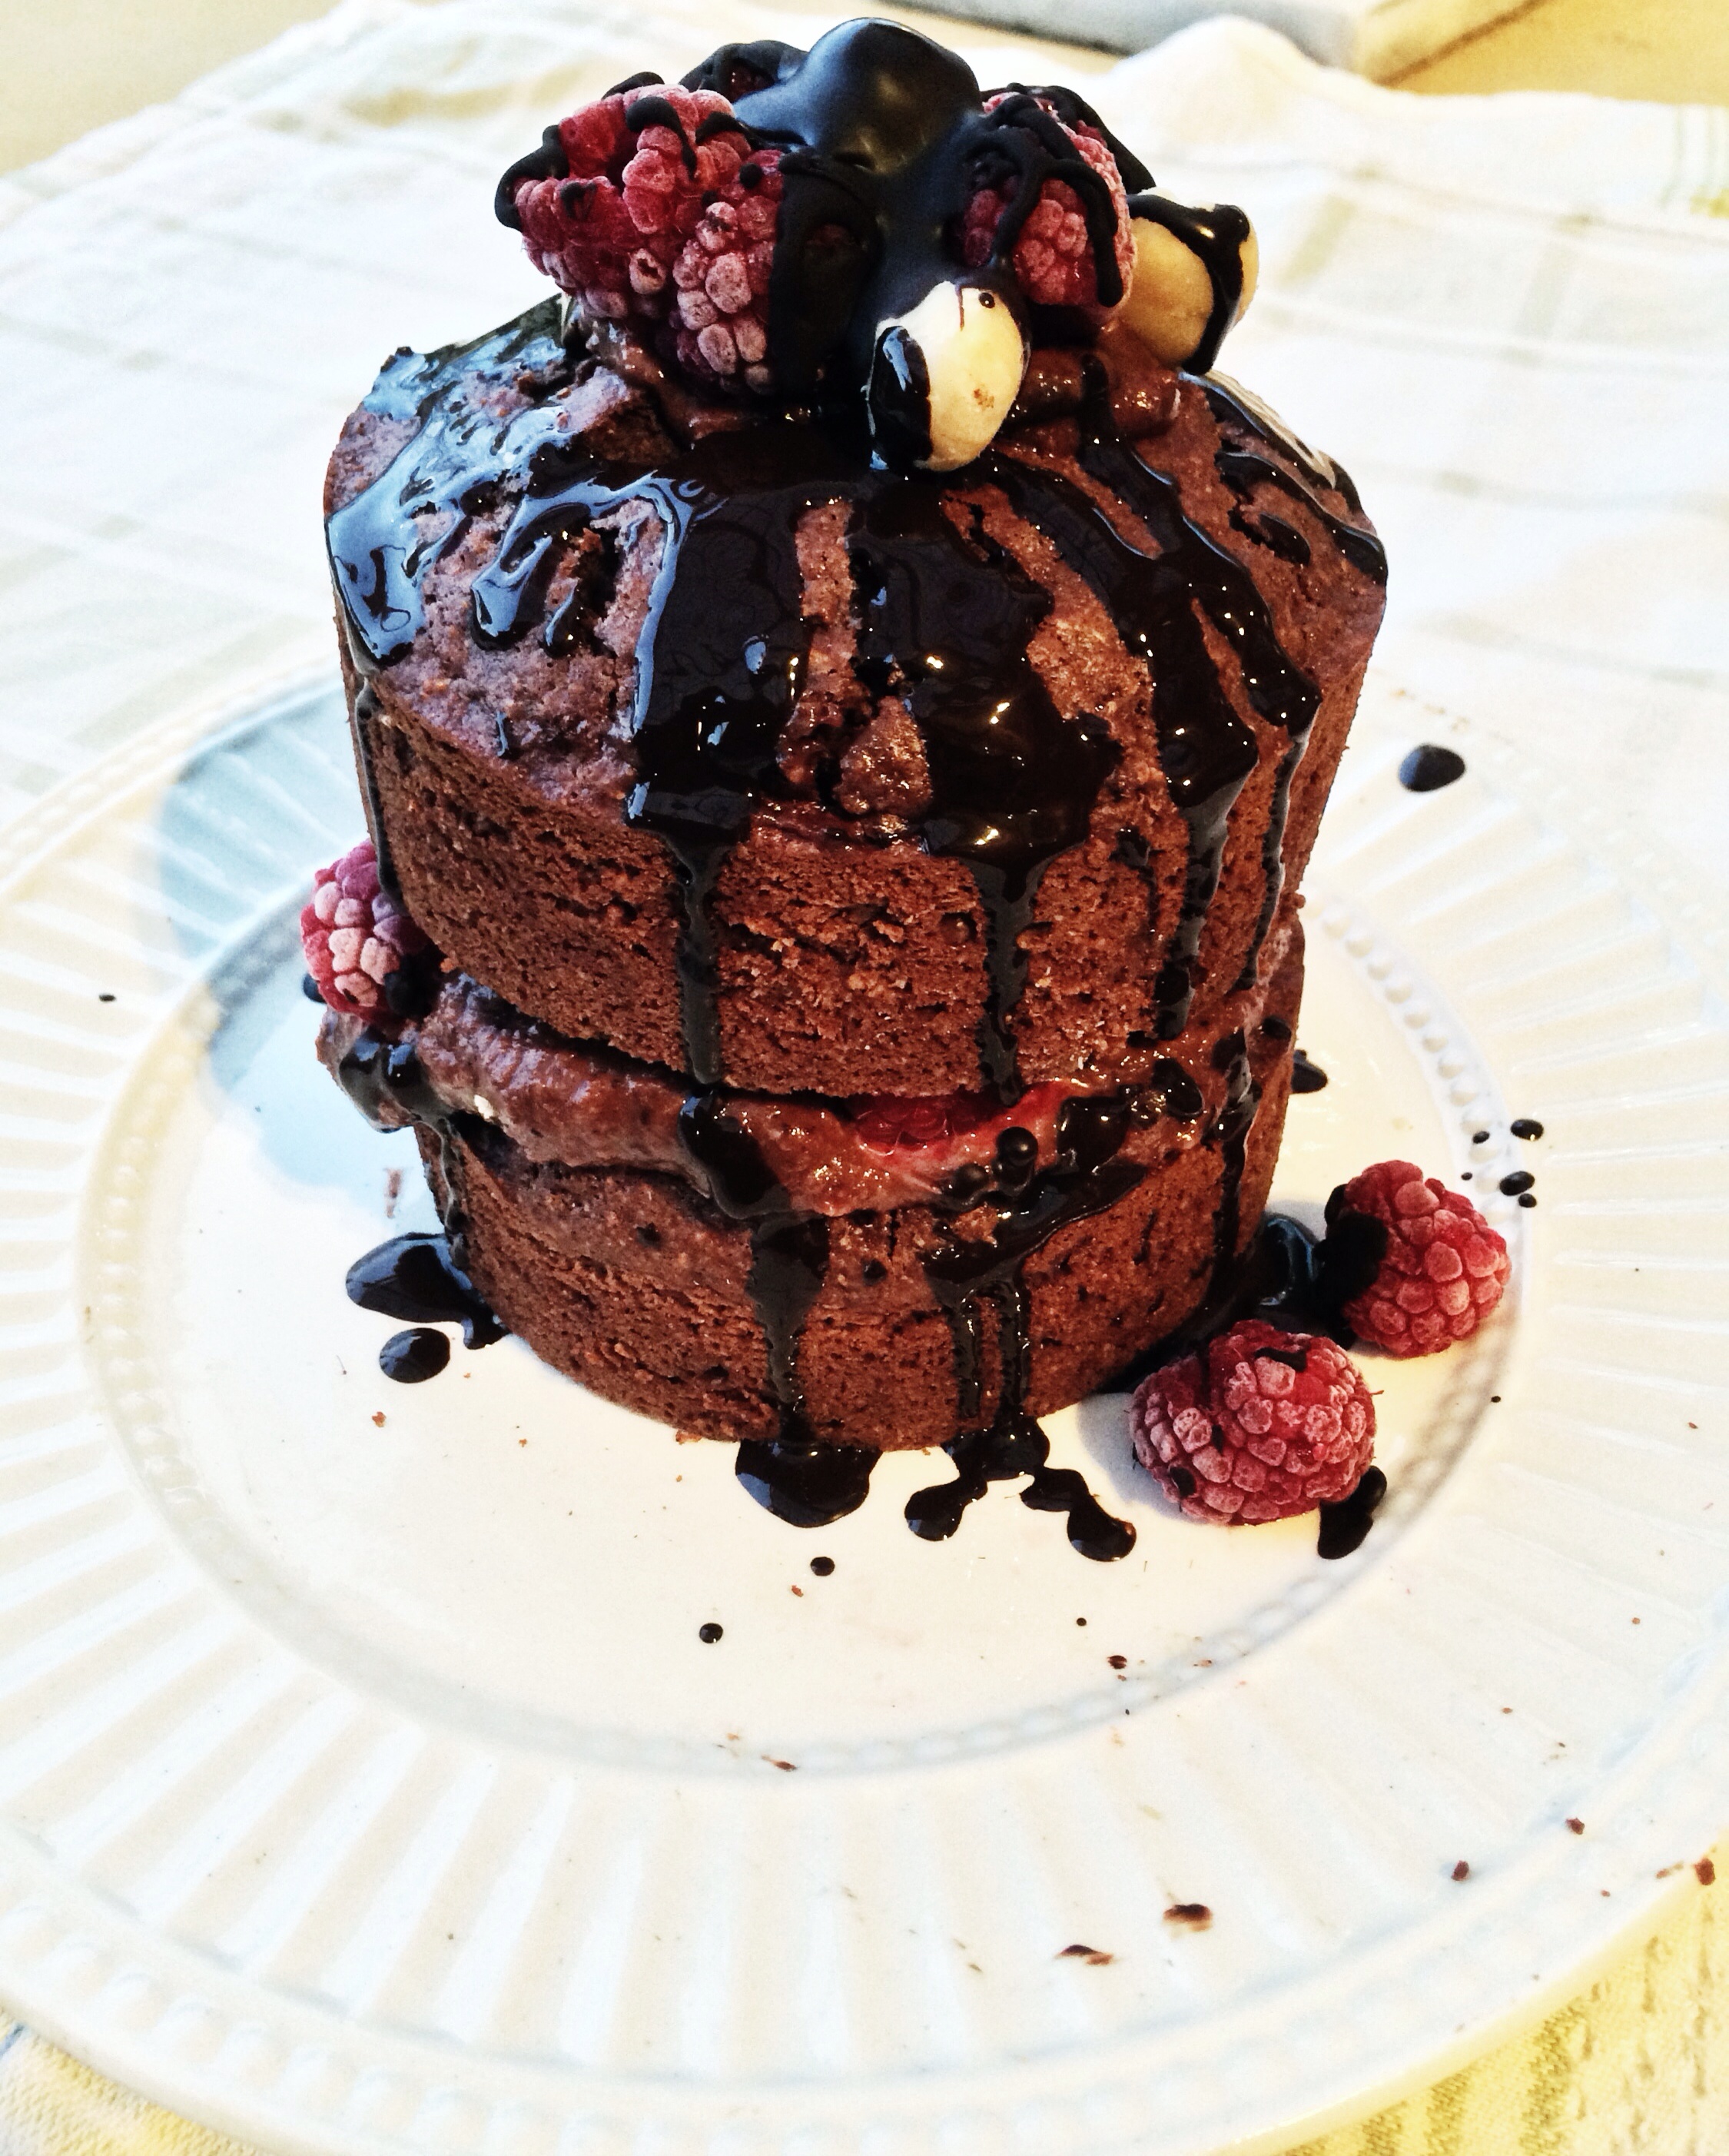
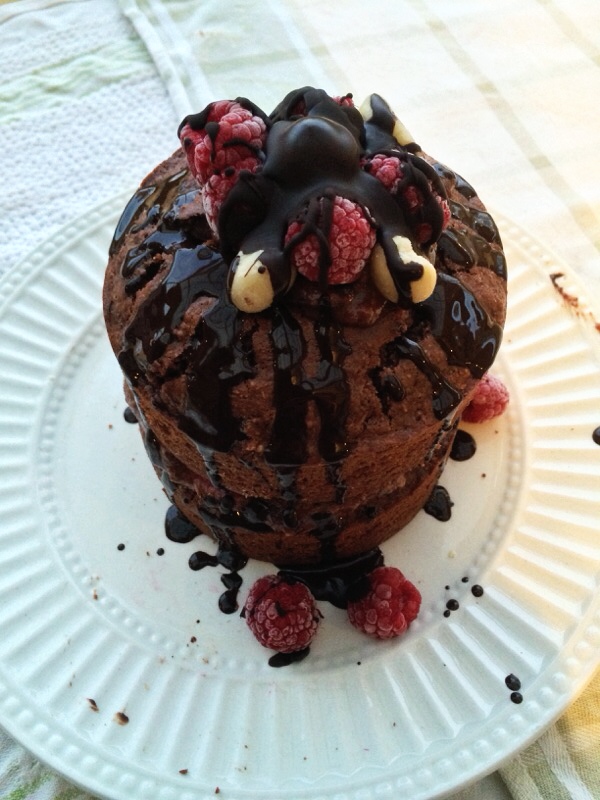
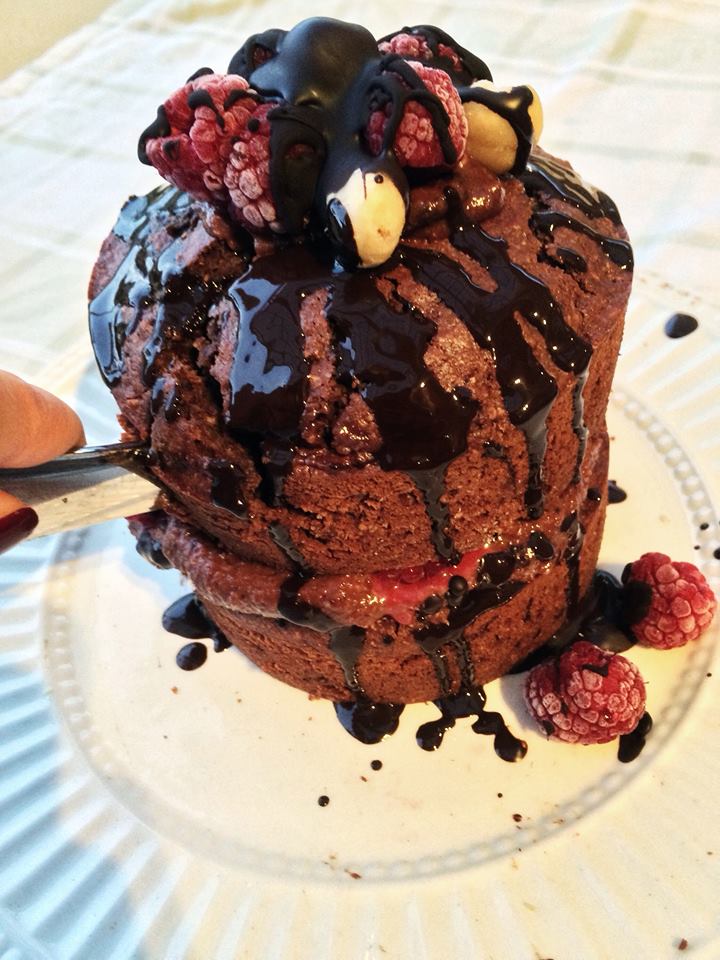
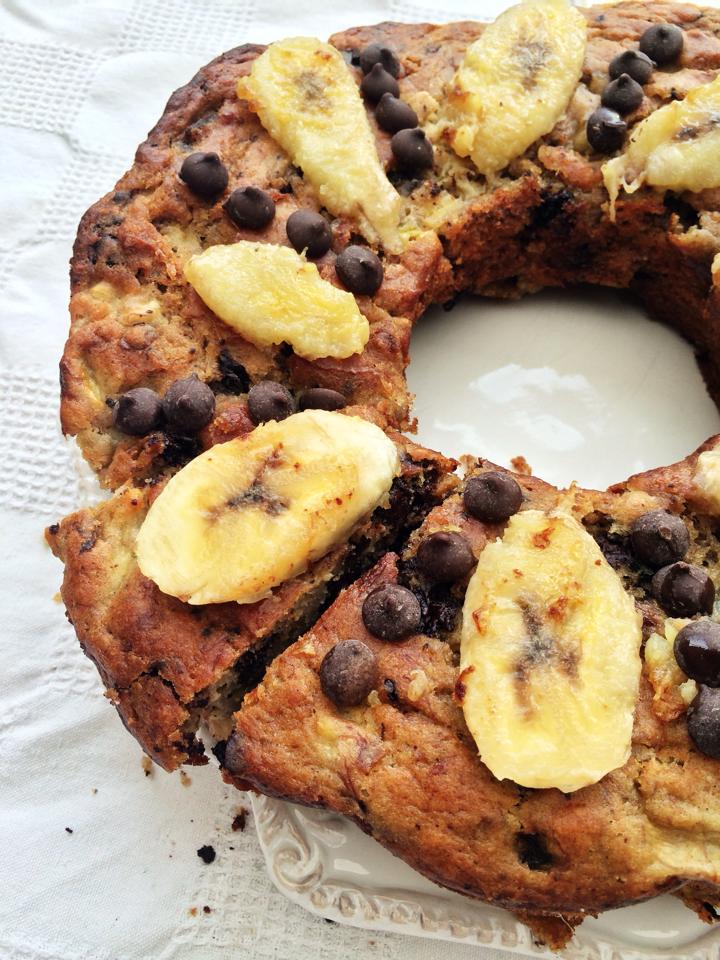
So it’s no secret that I LOVE cake. I will use any excuse for cake, and when I know something is only sweetened with bananas and dates, that’s all the convincing I need before I delve in and devour the entire thing. I’m not saying you should eat a whole cake, however you will allow yourself an extra piece (or two.. or three) once you try this yummy banana & chocolate cake.

Pretty on the outside and delicious on the inside – this cake is made up of 3 whole mashed bananas, meaning the consistency is moist and almost refreshing (can cake be refreshing? Yes, yes it can.) Did I mention you no longer have to worry about sticky fingers on your phone screen when you make my recipes? You can download my eBook for FREE by clicking on the ‘Subscribe’ tab above. Enjoy and happy baking xx
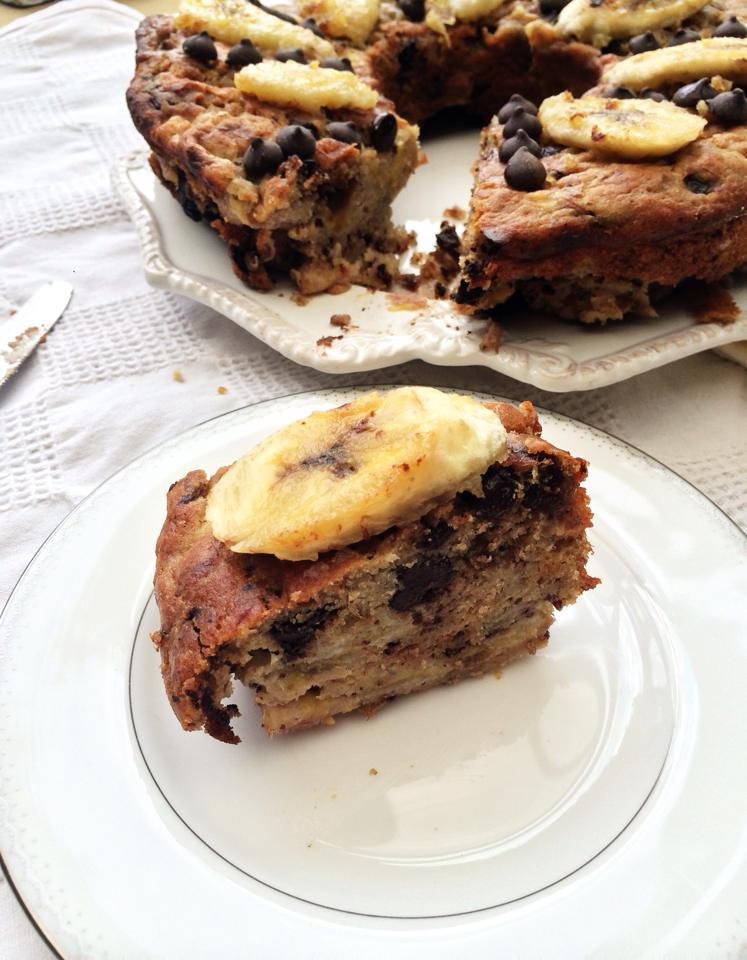
12065914_10153820076034388_4226408866439344967_n

12190072_10153820076154388_8222567657322947970_n


INGREDIENTS

3 large mashed bananas + 1 extra for decoration

1/2 cup melted coconut oil

18 pitted dates, soaked and chopped

1  2/3 cup wholewheat or spelt flour (or flour of choice)

2 tsp baking powder

1 tsp baking soda

1 tsp vanilla bean paste

3 eggs

Pinch of salt

1 cup almond milk

90% dark chocolate chopped


METHOD

  • Preheat oven to 180°C (not fan forced). Line a circular baking pan with baking paper or spray with baking spray.
  • In an electric mixer pour coconut oil and vanilla and mix until creamy.  Add one egg at a time to the mixture until combined.
  • In a large bowl sift flour, salt, baking powder and baking soda. Add liquid mixture and dates and fold through softly.
  • Add one cup of milk to the cake mixture and beat lightly, then add the chocolate chunks and mix through. Place in the oven for 40 minutes
    . Let cool before decorating with pan fried banana slices and dark chocolate.

12065628_10153820076489388_7661474600267012618_n


Spiced Apple Muffins

APPLE3


I can never get enough of apples. They are so sweetly delicious on their own – and even better in dessert. Last week I felt like something fruity, soft and spongy – so I created these Clean Spiced Apple Muffins. A great one for spring – and even better to bring to your friend’s dinner party (I will have one of these over a TimTam, thank you).

As you bite into the muffin, you’ll be pleasantly surprised by the chunks of apple that provide a fruity hit. Especially when they are mixed through cinnamon and nutmeg spices – mmm. Warning – these are addictive! Enjoy in moderation (if you can) 😉 xx

APPLE5


\


APPLE4


INGREDIENTS

1  2/3 cup wholewheat or spelt flour (or flour of choice)

4 poached apples, thickly sliced (optional: add Marsala when poaching)

6 heaped tbls melted coconut oil

1/2 cup rice malt syrup

10 pitted dates, soaked and chopped

2 tsp baking powder

1 tsp vanilla bean paste

2 tsp cinnamon

1 tsp nutmeg

3 eggs

1 cup almond milk


METHOD

  • Preheat oven to 180°C (not fan forced). Spray muffin pan thoroughly with baking spray.
  • In an electric mixer pour  coconut oil, rice malt syrup and vanilla and mix until creamy.  Add one egg at a time to the mixture until combined.
  • In a large bowl sift flour, nutmeg, cinnamon and baking powder. Add liquid mixture and dates and fold through softly.
  • Add one cup of milk to the mixture and beat lightly before adding the sliced poached apples. Spoon mixture evenly into each muffin holder and place in the oven for 20 – 25 minutes.
  • To decorate, slice an additional apple thinly and fry dry on low heat until browned. Place over muffins in a circular position once cooled and sprinkle cinnamon on top. Enjoy!


APPLE1

Chilled Berry Mousse


rfgs

There’s no better way to spend your weeks in the sun. It’s starting to slowly warm up in Melbourne… amongst the 12 degree days (joy) we have been experiencing tiny tastes of summer. It’s these days that inspired this seasonal dessert – and it’s super easy too.

This Clean Chilled Raspberry Mousse is the perfect treat for summer. Fresh, fruity and creamy, the texture of this dessert is as light and fluffy as any other delicious mousse you have had in the past – only different, no nasty ingredients. Pair with fruit after a BBQ with friends and you won’t have to skip dessert – enjoy!

dgheh


fgd

2


INGREDIENTS

3 cups coconut milk

2 gelatine leaves

1/2 cup rice malt syrup

1/2 cup raspberries

1/2 cup strawberries

1 tsp vanilla bean paste

METHOD

  • Place 1/2 cup water in a bowl with gelatine leaves and set aside for 5 minutes
  • Blend remaining ingredients
  • Place gelatin and water in a pan and put on low heat for 1-2 minutes and stir through mousse
  • Pour mousse into ramekins and place in the fridge for around 2-3 hours (or overnight if you can)
  • Decorate with a berry on top and you have the perfect summer treat – enjoy! X

11986323_10153738671809388_1198355527662281865_n


Salted Caramel Popcorn Slice

11825897_10153712098174388_3290530843727679113_n

Popcorn doesn’t just need to be enjoyed at the movies – this light snack is perfect paired with something sweet. This week, I was lucky to attend the preview of the Mission Melbourne Mexican Festival and I learnt that not only do I love Mexican food (tacos anyone?) but I also love Mexican desserts – including paletas (ice cream dipped in basically anything you can imagine!).

The yummy paleta I devoured was salted caramel and popcorn – and I knew this combination was something I had to recreate. Everyone needs a bit of paleta in their lives. This slice is perfect for when you want a bit of a crunch with something sweet. If you have kids – they’ll love this one! And don’t forget the Melbourne Mexican Festival is on this Sunday! Enjoy x

11953071_10153712098164388_3996845446188787971_n


11988603_10153712098329388_5993284796621828039_n

INGREDIENTS

1 cup walnuts

1/2 cup almonds

2 tbls almond spread

1 cup shredded coconut

14 pitted dates

3 heaped tbls coconut oil (melted)

2.5 cups air popped popcorn

2 tbls rice malt syrup

1 tsp vanilla essence

Large pinch of salt (or as desired)

METHOD

  • Soak dates for 5 minutes in hot water and process walnuts & almonds until fine. Add remaining ingredients except popcorn and process
  • Using your hands, mix the popcorn through the mixture. Pour into a rectangular baking pan pressing down evenly and pop in the freezer for 30 minutes – store in the fridge. Enjoy!

11947435_10153712098259388_5835824927084785486_n


Blueberry & Vanilla Swirl Slice

11863279_10153667207004388_7747829125620582993_n

For some of you who have been following me for a while, you would know I get extremely excited about  spring/summer. Yes, I know we are still in August, however in just 10 short days  (not that I’m counting) spring will be upon us and the streets will be lined with flowery trees and sunshine… So what does this have to do with clean desserts? Well rather than indulging in a warm apple pie – fresh fruit desserts suddenly seem much more appealing. So to celebrate pre-spring, I have created the ultimate spring treat – with spring colours too, of course.

Light, fluffy, sweet and purple – this clean blueberry and vanilla swirl slice is one to try with it’s creamy blueberry layer and ‘biscuit base’ made of walnuts, dates and coconut. And it’s pretty too! Enjoy xx

11139364_10153667207114388_3508303421579008435_n


11870663_10153667207069388_7182770944852234866_n


INGREDIENTS

Base:

7 pitted dates

1 cup walnuts

1 cup shredded coconut

1 tsp vanilla bean paste

1 tbls rice malt syrup

Blueberry & vanilla cream:

1 cup soaked cashews

1 cup fresh blueberries

1 tsp vanilla bean paste

3 tbls rice malt syrup

2 tbls melted coconut oil

METHOD

For base:

  • Soak dates for 15 minutes in hot water and process walnuts until fine. Add remaining base ingredients and process. Place base into a rectangular baking pan and use a spoon to distribute. With your fingers, press down the base until even and pop in the freezer while you prepare the cream

For blueberry & vanilla cream:

  • Blend all ingredients until combined well. Pour over base evenly. Using a skewer, slowly twirl in the cream in a circular motion to create a ‘swirl’ pattern. Once you are happy with the cream, pop in the freezer for 30 minutes – 1 hour. Store in freezer and let set for 5 minutes before serving. Enjoy!

11870815_10153667206959388_3240897419956144453_n

Pear & Date Upside Down Cake

11694782_10153620444254388_4130870866029103983_n


I am always overly excited each time I create a new recipe. I just love sharing it with you all and hearing the feedback! This cake is just too good to keep to myself. I made this cake at 4pm today – and it is now 8pm and completely vanished (in my tummy of course, and my family’s).

This clean pear & date upside down cake is something I am extremely proud to share. And for many reasons; it is moist, fruity, beautifully presented and subtly sweet. The combination of poached pears, and the delicious juices from them, mixed with the spiced cake with the sweetness from dates, really does make for a memorable food experience. I hope you enjoy!

11825944_10153620444594388_3593849200944659189_n

11800272_10153620443939388_7546904012297380075_n


INGREDIENTS

4 pears, cut in halves and poached or 1 can organic pears (soak in hot water for 1 hour)

6 heaped tbls melted coconut oil

1/2 cup rice malt syrup

10 pitted dates, soaked and chopped

1  2/3 cup wholewheat or spelt flour (or flour of choice)

2 tsp baking powder

1 tsp vanilla bean paste

1 tsp cinnamon

3 eggs

1 cup almond milk

Almond flakes

Sprinkle of stevia

METHOD

  • Preheat oven to 180°C (not fan forced). Line a circular baking pan with baking paper. Sprinkle stevia on the pan and drizzle 3 tbls melted coconut oil. Place the pear halves face down until they cover the pan base.
  • In an electric mixer pour remaining coconut oil, rice malt syrup and vanilla and mix until creamy.  Add one egg at a time to the mixture until combined.
  • In a large bowl sift flour, cinnamon and baking powder. Add liquid mixture and dates and fold through softly.
  • Add one cup of milk to the cake mixture and beat lightly before pouring over the pears. Place in the oven for 1 hour and 20 minutes. Let cool and then flip to serve!

11694001_10153620444094388_7941730055339809450_n

Rocky Road inspired Chocolate Cake

image-1

We all wish we could eat rocky road every day of the week – well at least I do. We also wish we could indulge in cake every day of the week (again, referring to myself – I assume I’m not alone on this one?) so I decided to put the two together for one very decadent dessert.

This clean rocky road inspired cake was made for those nights where you feel like being naughty, but don’t exactly want an unhealthy rocky road slice – think sugary chocolate and lollies. Instead you can have your cake AND rocky road, without the guilt. Or maybe you just want a healthier version of rocky road.  Enjoy!

Jess xx

photo 2-5


11745387_10153599245489388_2092741950523978417_n


INGREDIENTS
Chocolate Cake:
2 cups wholemeal flour
4 tsp baking powder
1/2 cup cacao powder
1/2 large block of 90% dark chocolate melted
3/4 cup rice malt syrup
2 eggs
1 cup milk of choice
1 tsp vanilla essence
1/4 cup olive oil
1/3 cup raspberries

Chocolate cream:
1 cup soaked cashews (soaked for 30 min – 1 hour)
3 tbls cacao powder
3 tbls rice malt syrup
1/4 cup shredded coconut

Decoration:
Fresh raspberries
Macadamia nuts chopped
Melted dark chocolate

METHOD
For cake:
• Preheat oven to 180 degrees Celsius and spray two medium sized circular baking pans (same size) with baking spray. Alternatively, you could use one baking pan and cut the cake through the middle to add the cream.
• In a large bowl, combine all dry ingredients (flour, baking powder, cacao) lightly
• Using a separate bowl, mix all liquid ingredients together leaving the raspberries aside. Ensure to melt the dark chocolate before adding to the bowl.
• Make a well in the centre of the bowl with the dry ingredients and add the liquid mixture. Mix lightly until combined and then stir through the raspberries.
• Pour cake mixture into the two pans evenly and pop in the oven for 25-30 minutes. You may have some mixture left over so feel free to make some extra cupcakes! When the cakes are ready, let cool while you prepare the cream

For cream:
• Blend all ingredients in blender until combined well and set aside

For decoration:
• Once cakes are cool, ensure they are the same size (you may need to cut the top of one so it is flat). Smear the chocolate cream over the top of the cake with the flat top. Add raspberries and macadamias on top and then place the other cake over the cream to create a double layer.
• Melt dark chocolate and pour a ‘blob’ on the top of the second tier. Place raspberries and macadamias on top straight away so they stick in place when the chocolate hardens. Drizzle dark chocolate down the sides of the cake, serve and enjoy!

11760178_10153599192509388_2738685855334441980_n

Peanut Butter Chocolate Fudge Pie


11667422_10153556324709388_1048486136301887336_n


It’s no secret that peanut butter and chocolate make an incredibly delicious pair – and it’s no secret that the world is crazy about peanut butter…. and chocolate. So what happens when you create a peanut butter biscuit base with rich chocolate fudge? The ultimate treat.

You will be blown away by how ‘unhealthy’ this clean dessert tastes. I managed to put some aside for my boyfriend (probably a third of the pie) and he managed to demolish it in record time while saying “this is SOOOO good. I can’t believe it’s natural!” – and that’s a lot coming from someone who loves sugary sweets! (Sorry Nick)

11667483_10153556324609388_9158954294390334141_n


11231318_10153556324489388_6234486371975808891_n

INGREDIENTS

For peanut butter biscuit base:
2 cups spelt flour (or wholemeal)
½ cup coconut oil
1/4 cup NatVia
¼ cup almond milk
2 ½ tbls natural peanut butter
1 tsp vanilla extract
2 tsp baking powder
½ tsp salt

For chocolate fudge:
1/2 cup rice malt syrup
1/2 cup coconut oil
1/3 cup cacao powder
1 tsp vanilla essence
2 tbls hazelnut spread

METHOD

For peanut butter biscuit base:

  •  Preheat oven to 190°C and spray a large tart or pie tray with baking spray.
  • In a mixer or large bowl, combine coconut oil and rice malt syrup, and then add almond milk and vanilla.
  • In a separate large bowl mix flour, baking powder and salt together lightly and pour into large bowl with peanut butter and liquid ingredients.
  • Mix thoroughly to a cookie-dough texture and press evenly into the pie pan using your fingers.
  • Bake for 10 minutes and let cool while you prepare the fudge.

For chocolate fudge:

  • Blend all ingredients and pop the pie tart out from the pan and onto a plate. Pour the fudge into the pie and pop in the freezer for 1-2 hours to set. Enjoy!

Jess x

11011528_10153556324549388_8781424722047300964_n


Mint Slice Biscuits

11412267_10153508520784388_4109197218592317224_n

As most of you may know, the aim of My Clean Treats is to recreate my favourite desserts with healthy ingredients. It’s difficult when you crave something sweet and know it will do more bad than good for your body. Life is about enjoying – so why give up dessert? Since as long as I can remember, my grandparents would often open a packet of Arnott’s Mint Slice after a big Italian feast. To this day, it is still hard for me to say ‘no’ when offered one of these yummy biscuits.

Enough about my love of the biscuits. Today, I decided if I want to enjoy an Arnott’s Mint Slice – I can! And that is exactly what I did, all ‘clean’ of course. This recipe may be a little trickier than the others, but once you taste the finished result and see 24, lovely-looking chocolate biscuits in front of you – you’ll be happy you went the extra mile. Enjoy!

10805651_10153508521039388_6063696957346680996_n

1174561_10153508520889388_2219021090106282218_n

INGREDIENTS

Biscuit base:

2 cups whole-wheat or wholemeal flour

1/2 cup coconut oil

1/4 cup NatVia (stevia) or 1/2 cup rice malt syrup

¼ cup almond milk

1 tsp vanilla extract

2 tsp baking powder

1/4 cup cacao powder

Mint filling: 

1 cup cashews (soaked for 20 minutes)

2 tsp peppermint essence

2 tbls rice malt syrup

¼ cup shredded coconut

Drop of green food colouring

Dash of milk if needed

Chocolate coating:

90% dark chocolate or organic dark chocolate (I used Lindt)

METHOD

For biscuit base:

  • Preheat oven to 190°C and line baking tray.
  • In a mixer or large bowl, combine coconut oil and rice malt syrup, and then add almond milk and vanilla.
  • In a separate large bowl mix flour, baking powder and cacao powder together lightly and pour into large bowl with wet ingredients.
  • Mix thoroughly to a cookie-dough texture and then roll the dough using a rolling pin. Once the dough is flat and even, use a small, circular cookie-cutter to shape the biscuits. It will make around 24.
  • Bake for 10 minutes and let cool while you prepare the mint cream.

For mint cream:

  • Place all ingredients in blender until a smooth, cream-like texture. This may take a few bursts. Add a dash of milk if needed.
  • Once biscuits are cool, use a teaspoon to distribute the cream over the top of the biscuit base. Ensure to spread the cream evenly across each one and place in the freezer for 30 minutes.

For chocolate coating:

  • Melt dark chocolate and remove the biscuits from the freezer. Drop each one into the melted chocolate or use a spoon to cover the entire biscuits – top to bottom. The chocolate will begin to harden straight away.
  • Once all are coated, place back in freezer for 30 minutes and then store in the fridge. Enjoy!

11232069_10153508520544388_3305418804307533670_n

Cherry Ripe Bites

11350441_10153475597294388_4408361858351410688_n

Don’t you love biting into a rich, dark chocolate cherry ripe after a hearty dinner? The combination of bitter dark chocolate and sweet cherries is deliciously decadent and perfect for enjoying in front of the fire on a chilly night. My Dad has always been a big fan of Cadbury’s Cherry Ripe so I was excited to hear his opinion on my healthy take of the famous chocolate indulgence.

Cherry ripes are quite rich so it may be difficult to finish the whole bar – that’s why I created healthy Cherry Ripe Bites so if you want to stop at just one, you can. These bites have all the key ingredients of the real cherry ripe; dark chocolate, cherries and coconut – what more could you ask for? Oh, and they are definitely approved by Dad (they were all gone within a few hours). Enjoy!

11390316_10153475597224388_1192799224073621295_n

11427242_10153475597334388_6422703311582284200_n


INGREDIENTS
1 cup walnuts
7 pitted dates
1 1/2 cup shredded coconut
2 tsp cherry essence or 150g fresh (or glazed) cherries
1.5 tbls rice malt syrup
1 tsp vanilla essence

90% dark chocolate to decorate (I used Lindt)

Optional if needed: red food colouring

METHOD

  • Soak dates in hot water for 2-3 minutes.
  • Process walnuts until fine and then add dates. Add remaining ingredients except dark chocolate and process well until mixture sticks together.
  • Spray a small baking pan with baking spray and roll mixture evenly into round balls with your hands.
  • Melt dark chocolate and dab a small amount on each ball allowing it to drizzle down the ball. Pop in the freezer to let the chocolate harden for a few minutes. With the remainder of the dark chocolate, using a teaspoon drizzle it quickly over each of the bites to create the squiggly texture over the top.
  • Pop back in the freezer for around 10-20 minutes and then let sit and store in the fridge – enjoy!

11390322_10153475597194388_4088837119305682937_n